Friday, August 26, 2016

Overlay Illusion

Annie Stewart wrote:
I think I have more of a construction question, but it leans towards design. I'm quite taken with the "overlay illusion" you use. As in across the moon in some of the October series. How do you have to overlay effect include both the background AND into the moon, and get all of the curved lines to be continuous across both planes? Did that make any sense? Can you show me a step by step? Thanks!!
Answer:
Since I didn't take photos of the steps in the quilts Annie cites, I decided to make another one of them for this demo. I kept the original drawing so that is where the overlay illusion begins.

As you see, the lines of the pattern show sections that connect. This is how I will be able to plan where the moon begins and the background meets it.
First, trace the pattern, making adjustments to the elements in the design, if necessary.
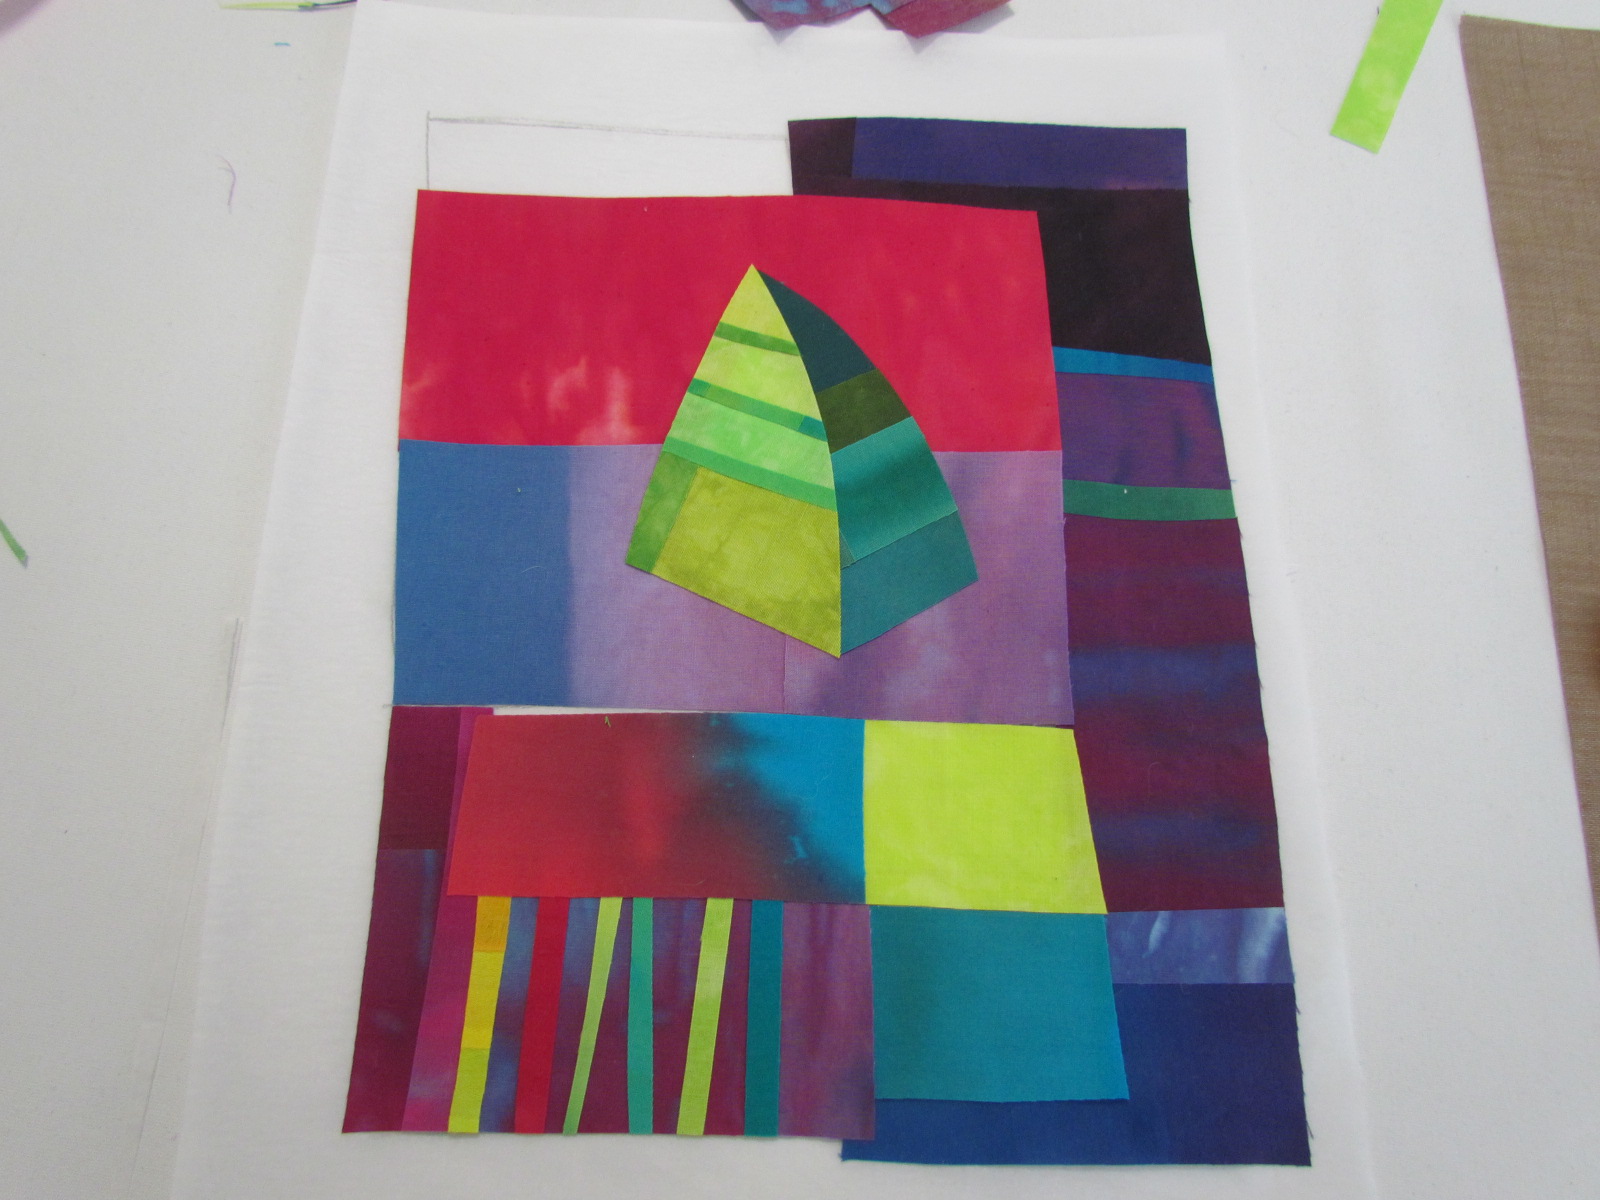
 Next build the background, fusing the shapes onto the tracing, carefully lining up the cut lines with the lines of the moon shape.
 Then add the silk shapes, making sure that they overlap the background color, just a tiny bit. Notice how the silk still lines up with the background line. The next pieces will have to slip under the lined up piece so that the line continues uninterrupted.
  I've added some more connecting lines in the moon area and those will follow the same lines, both horizontal and vertical. There might be some trimming needed to reinforce the design 

  And the finished top, quilted.
For your assignment, if you choose to try this, draw a small pattern for yourself with shapes that line up. Consider what goes first and then what goes next to that part. Slide pieces underneath the adjoining piece if necessary. Carefully fuse the finished product and post it on Post your homework. 


Friday, August 19, 2016

Composition and Design

Charlene wrote: Will you be talking later about the design step? Any tips about composition?
  1. I replied: Yes, I will be discussing composition, but what do you mean about the design step exactly?
  2. Charlene wrote: I say 'design step' as another way of saying composing the final piece. Once you have all the parts made, next you put them together, designing or composing the whole. I'm really looking forward to that discussion.
  3. I said to myself: Gulp. This is where the lesson plan all falls apart. But here goes. In my experience there are two ways of designing, with a plan and without a plan, also called improvised. I went to Wikipedia and searched for Composition, hoping for a way out of having to declare HOW TO DESIGN A COMPOSITION.
  4. https://en.wikipedia.org/wiki/Composition_(visual_arts)
  5. That pretty much said all the things you need to know, but I wouldn't dare tell you that this is THE WAY to design. Art just isn't like that. 
  6. For our class, I am hoping to give you the elements and techniques that  allow you to come up with designs or compositions of your own without having to fret over the so-called rules. I NEVER think about the rules. It takes all the fun out of discovering something that you have never seen before.
  7. In artwork, a design may be something that has a planned layout or composition, say a grid, or vertical panels, or concentric squares, or cruciform, landscape or portrait etc. There may be a motif which is the focal point of the design, or it may have a subject matter, such as a house, a tree, a horse, a circle, or star. All the elements within that design may be supportive of that subject matter, but already I am wandering off into rules and specific definitions. I hate that!
  8. When it comes to doing something with the parts you have made, this is where you play (or improvise) with them and arrange them in a manner that is pleasing to you. TO YOU. It is important that you feed your brain with images that appeal to you and determine what it is about that piece that is its strength. I call this research.
  9.  Pinterest has millions of ideas and I suggest you take advantage of what can be found there, and not just in quilts, but in all sorts of design imagery. I collect designs on a pinboard called Surface Design. I am constantly inspired and feed my muse with the clever things I find and pin there. I also pin ideas on my Fabulous Fusing pinboard. You might see some of your own work that I pinned there from our Show YOUR homework page.
  10.  So for today's lesson Join or go to Pinterest.com and make a Design board for yourself. Once you have collected some thrilling-to-you-images, share the links to your boards in the comments.
  11. ++++++
  12. OK, you want an assignment. I get it. So let's practice what we learned and this time you will make something of your own design. Make something small. In this case we are going to cut the batting first and that will give you an idea of what size shapes to put on it. OR you could draw out a rectangle or square on the release paper and use that as a guide.

When we fuse a small work it helps to start with an idea of the finished size. Then the pieces we use will be to scale.

Or use the release paper from the Wonder-Under, and draw the finished size on the paper with a pencil. We will assemble the top on the paper, and after it is completed it will then be fused onto the batting.
The reason we have drawn the size on the paper is to help place the pieces within the space. This is especially helpful when cutting the background pieces.


Large pieces of fabric are often daunting to cut, so I suggest cutting off a three inch piece from each color. You may still have to cut into the large pieces but you will have some small pieces to cut into details.
I am using chunks of leftovers and some are already missing large parts, but no matter, I just put another piece in the missing space and it looks like I layered it over a full piece.
But the deceptive truth is that everything that is on top is covering an empty space.


The turquoise piece on the left shows that missing part. I used the sliver of soap to outline the part covered with the orange piece, and then I trimmed away the turquoise piece. It fits under the orange now with only a small bit connecting the two.
I am not suggesting any of the dimensions of these pieces, as you will be making those choices yourself. Just keep it simple and it will all work out just fine. Really.


I keep adding more chunks of fabric, building up the composition.
Nothing is fused down YET. I am still arranging and judging how it looks. This is where the 'designing' comes in. I am just looking for a pleasing arrangement, with colors that look good together.

There will be some trimming and neatening of edges before I do the fusing.


Nothing has been measured or is perfectly square.
Let go of perfection for this project.


The composition is nearing completion, and I am adding the larger chunks to fill in the background spaces. It really helps me to know where the outer edges are, so I can work in the fabric were it fits. Some gaps occured and that provided 'design choices' such as that horizontal turquoise piece on the right.

I have begun adding thin lines on top and underneath the pieces to ground the composition. I really dislike floating objects. The shapes need to relate to each other and the outside edges as well.


At this point I have LIGHTLY fused all the pieces to each other, and onto the paper. I use a tweezer to lift some edges to insert the thin line pieces under the top layer.
The finished top, fused onto the batting and trimmed to size.
I've added a few more lines, some dots and triangles and stopped myself from overdoing it. I will rely on the machine quilting to add the right finish.

IF I were going to do any hand stitching, now is the time to do it. I would stitch through the top and batting with either embroidery floss or perle cotton size 8 or 12. Then later after the backing is sewn on, the machine quilting will be done.


Keep in mind that trimming each piece of fabric  before the final fusing helps keep the look of the design neat and clean.
After the composition is complete, follow through with the finishing technique of your choice.


Posted by Picasa

Friday, August 12, 2016

Finishing Techniques


For this lesson, I'd like to show several ways to finish a fused quilt. The size of the quilt can make a difference in how it is finished, but for now let's just look at small works, and how to quickly make them ready to hang on the wall. Yes. Hang on the wall. These fused pieces are not washable, or functional in terms of being handled often. So we will be treating them like the artworks that they are.
  With this quilt that we copied last week, I hand quilted and embroidered around the tree and a little in the horizontal and vertical lines. I used hand embroidery thread, three threads in the needle and tried to make it look like little bumps. The hand work was done only on the top and the batting, no backing fabric was added at that time.


When I was finished with the hand work I used the Escape Hatch Finish for the little piece and then machine quilted it through all three layers. Here is an example of a quilt that used the Escape Hatch Finish:


But that is only one way to finish a small work like this and not one I use much these days.


Nowadays I like to machine and hand quilt before I put the backing on. In fact I like to cut my batting about a half inch smaller on all sides, fuse it to the quilt top and then I sew off the edges of the piece which later makes the finish so much nicer, in my humble opinion.
Here's how to do this finish:
Place a layer of batting under the quilt top and cut it to the exact size and shape of the top. 
Nice and neat.
 Remove the batting and cut off a good half inch from one vertical and one horizontal edge. Then replace the batting so that the edges of the fused top are visible from under the batt, about a 1/4" or more.
Carefully fuse the top to the batting, on your pressing sheet or release paper, not the work surface! You are ready to quilt, no backing fabric is necessary. For this lesson we'll just skip the hand work.
Machine stitch next to, but not on top of the shape, usually on the underneath piece. I use a self threading needle to pull the thread through to the back. I am using my regular open toed foot, not my walking foot, or darning foot, and the feed dogs are up. I do loosen the pressure on the presser foot so the quilt moves through freely.


The machine quilting is done, and you can see the threads hanging off the edge, but none are visible on the face of the quilt itself.

 OK I admit this is a mess, but never fear, no one will ever see this. It's our little secret.
Next, snip off a square from each corner of the quilt right up to the edge of the batt.
 All four corners have been snipped and the edge is ready to fold back and fuse to the batting.
Folded and fused. Still looks pretty awful but just wait...
 Cut a piece of fused fabric the same size exactly as the quilted piece. Trim away a good 1/4" from two sides.
Cover the back and fuse into place. A small edge of the folded top is visible but all the threads are secured on the back.
The finished work. No messy threads, and best of all, no binding to sew!
 It looks better to sew off the edges and fold them back so that the quilting doesn't have to stop short. 

I like to hang my small works on wood panels that I buy either from Cheap Joes or Dick Blick. I paint just the edges of the board so that the quilt itself covers the unpainted parts. See this post for further instructions on how this is done.
 
If you'd rather not use paint, fused fabric works great with these wooden panels. Just wrap and press to the back with a hot iron, and it stays stuck. Really. I've tried to remove that fabric and it is just a struggle.
Another way to finish a piece which you may have quilted through all three layers is to fuse on a binding:
 These two quilts were bound with strips cut with the rotary cutter wavy blade. Cut a strip about 1.75" wide and trim one edge with the wavy blade (or not). Finger press the length of the strip in half. Encase the edge and fuse, repeating on all sides.
The strips could be cut to form mitered corners, if you like. The labels were also fused.


One more way to finish a quilt is to face it. See this post for the complete tutorial.

Friday, August 5, 2016

Fusing from a Pattern


To make a fused composition from a pattern I have chosen a simple little design in which I can demonstrate how to use a drawing to create a small work. The original piece is only about 7x10". Using the release paper leftover from the Wonder-Under, draw a facsimile of the quilt pictured. (I added a few extra lines in the drawing, no biggie!)


With a second piece of release paper, trace the shapes of the little tree.
I suggest that you write G on the tracing to remind yourself that the G goes on the GLUE side of the fabric. Cut the two pieces apart, on the drawn lines.
Audition fabric for this piece, using some previously strip fused fabrics
 Flip the pattern piece over, as well as the fabric, glue side up, and place the pattern where you want it. With the iron's tip, CAREFULLY fuse the center of the paper to hold it there temporarily.
Trim the fabric, close to but not exactly on the pattern piece. Never rotary cut through the paper.
 Lift the paper off the cut shape and flip it over.
Notice that the fabric piece is just slightly larger than the pattern. Totally correct.
Audition the second piece and again flip it over and tip-press the iron onto the fabric.

 Trim the fabric away from the paper shape.

  
Slip the darker green section under the lighter green section and fuse them together, LIGHTLY.


Trace the area 'behind' the tree shape, bringing the drawn lines in so a small bit fabric will be under the tree shape.

Cut the background paper shape and test that the tree shape fills the void. Again mark the glue side with G's.
Choose a background that will contrast with the tree shape and place the pattern piece on the fused side and  fuse lightly. In this photo the Gs are visibly backwards. This is correct.
Flip the fabric over and remove the paper.
Place the background fabric in the spot on the pattern that corresponds. Fuse lightly.
Then trace the shape above that section, marking it as before.
 
Slide the top piece into place under the tree shape and fuse lightly.
NOTE: While it is possible to just fuse the tree shape onto a background, the lesson here is that there is nothing underneath the tree shape but a narrow edge to fuse it too. In larger works this is more important, but this is an easy way to learn how it is done.


 Since the next spot would line up later with the trunk of the tree, I wanted a two color piece, so I lay the pattern on a fused combo of two fabrics. I was more concerned that it lined up with the center of the tree than if it fit perfectly under the background piece. You will see how to cover that gap later.

 This is the bottom left section and I wanted a strippy look, so I traced the section, found a plain fabric and added strips, then trimming them even.
I added a turquoise square under the yellow one and then I am ready to trace the outer edge of the composition.
The tracing  of the outer edge...
Audition a complex striped fabric to see if it works with what is already created.
 Fuse the paper in place, lightly and cut away the excess fabric.
 

Place the edge piece and fuse it just to the PAPER pattern, not the rest of the composition. This stabilizes the section so more strips can be added to it.
This is when the gap is covered with a fabric strip, hiding the opening and connecting the top and bottom sections, as well as the side edge piece. Trim the outer edge and fill in the top left section with fabric, also striped.

 To add the 'tree trunk' cut a straight strip and trim one end to a point and cut the other end on an angle. Place the strip on the join of the tree curving it as you press, and continue it down on the join of the section below. 
 The trimmed composition place next to the original pattern. At this point dots can be cut and added as the final elements.
This is a good time to fuse the whole design to release paper with more than just a light touch.
Next week we will fuse the composition to batting and finish it with stitching.